Blog

Performance in OpenSim

Yay, I have a new job! I’m now an Open-Source Software Developer at TU Delft, where I’m going to be working on biomechanical simulation software.

Why do I mention this? Because I’m initially tasked with trying to make OpenSim faster, which is something that beautifully ties together a few of my loves (research software, systems development, and low-level perf optimizations) with a few of my hates (software written by researchers, C++, and diagnosing cache misses) and I’ve been wanting to learn+write about performance for a while.

With that in mind, I would like to write a few short blog posts on any interesting performance topics I come across while working on OpenSim. These posts are mostly for my own record, or (at best) as a way of articulating my work to other people on the project. I figured that, because this work is going to be open-source, there’s little downside to sharing my notes publicly.

Overview

While reading my perf posts, it’s important to keep in mind who’s writing this (me), what OpenSim is, and what you should probably already know (basic C/C++):

  • I’m a general software developer, not an academic researcher. I have a background in research, but my professional expertise is in engineering stable products/systems.

    • Therefore, any perf posts will focus on established software techniques, rather than anything research-grade.

    • So, if you want to read about simple profiling techniques, you’ve come to the right place. If you want to read about novel collision detection algorithms, wrong place.

  • OpenSim is a large (>100 kLOC) C++ application written by clever people with PhDs in biomechanics:

    • Therefore, any performance changes have to “fit” into the existing codebase extremely cleanly. This can include (for example) reproducing buggy behavior or supporting technically-incorrect and legacy API usage patterns.

    • It also means that there is a lot of code in OpenSim that’s faaar too specialized for a generalist like me to feasibly learn and reimplement from scratch. There is code in OpenSim that was written years ago by experts in the field who have since moved on. It would be foolish for me to (e.g.) try and reimplement algorithms that took an expert 5 years to develop the first time.

    • So, if you want to read about performance-tuning a large application extremely incrementally without breaking too much, right place. If you want to read about performance-tuning a small, standalone application with no wider context, wrong place.

  • OpenSim is a (mostly) single-threaded non-distributed application:

    • Therefore, these performance-related posts are mostly going to be focused on single-process perf. optimization (reducing cache misses, minimizing memory use, cleaning up a single application), rather than distributed application optimization (logging events, measuring network bottlenecks, etc.).

    • So, if you want to read about finding performance hotspots in locally-ran applications, right place. If you want to read about performance optimizing a distributed application (plus all of the other crap that might entail, like figuring out why your cloud servers are slower on Tuesday mornings), wrong place.

  • I’m going to assume you know C/C++ development and general coding principles (functions, IO, etc.) for the more general posts.

    • I prefer dumb, easy-to-debug, patterns. Most of the C++ code I will be showing should fall into this category. You will not need to know the more advanced topics (SFINAE, virtual inheritance, etc. etc.), but I might dip into those occasionally.

    • In lower-level posts, I might write statements like “in the std::vector<T>, T.x’s are spread far apart in memory, so performance suffers due to L1 misses”, or something like that. You can probably ignore those posts, because they’re at a level that is faaar below most of the profiling work I do (most performance problems in large systems are much more boring high-level issues).

    • So, if you want to read about some C++ perf work I did without too much explanation about every implementation step, right place. If you want to learn C++, wrong place.

Ok, that’s the disclaimers sorted. Now to actually write some posts.


TextAdventurer: Rust Edition

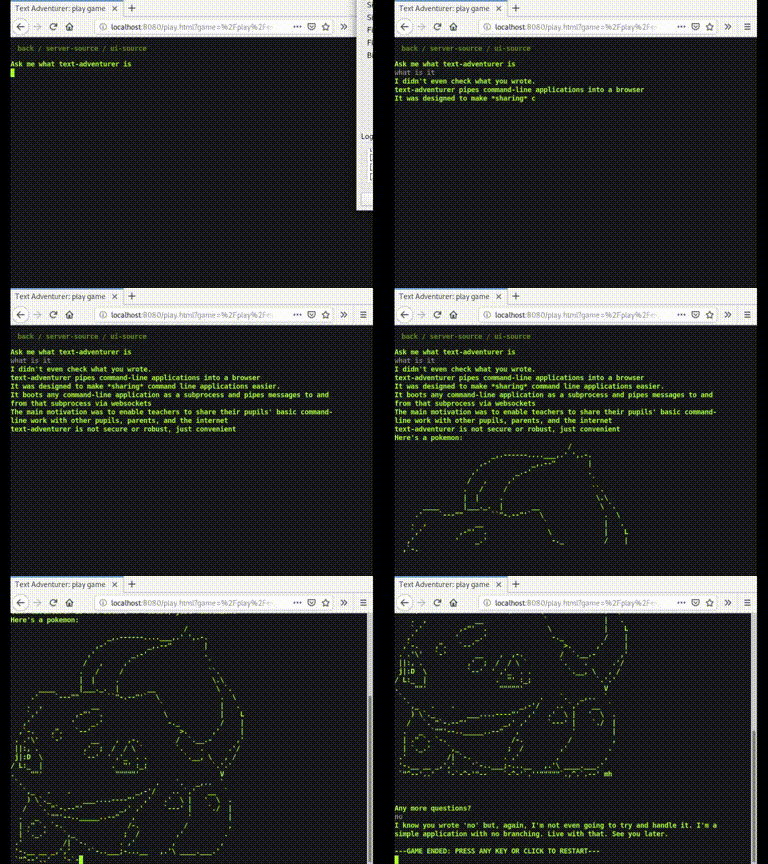
Just as a little fun, I decided to rewrite textadventurer in Rust (demo, source).

The server was initially written in ~600 LOC of Java with a basic websocket library (source). The Java implementation worked fine–it was essentially just a tiny tech demo to demo a jobson feature–but I decided to rewrite it in Rust so I could understand where the pain-points are in an application like this.

This is an interesting standalone Rust project because:

  • It’s small and standalone. A minimal implementation would only really require a basic HTTP + websocket implementation.

  • It requires multithreading and appropriate IO handling, because each game that’s launched in a browser effectively launches a live process server-side. The live process can write to a client at arbitrary times and visa-versa for the client writing to a process.

  • It has several interesting edge-case conditions that need to be handled correctly in order for the server to not leak:

    • Clients can disconnect at arbitrary times. Subprocesses must be killed appropriately.

    • Processes can exit at arbitrary times. The server has to ensure it waits on the process to prevent zombies. Clients need to be informed appropriately.

    • Clients behave slightly differently in how they handle websocket connections. For example, Firefox seems to keep TCP and websocket connections open even when a user closes the browser tab, so the server can’t rely on sessions being closed appropriately.

The reimplementation used actix-web, an actor system. Actor-based architectures are really interesting for these types of servers because they greatly simplify the mental juggling required to understand concurrent processes.

The Rust rewrite was actually smaller (<600 LOC) than Java original version and had more features (command-line flags, configuration options, etc.) and used significantly less RAM and CPU than the Java version. The resource usage drop is especially nice because I like paying less for my cloud servers :)


So Damn Close

So my latest interest has been trying to squeeze performance out of simple algorithms - mostly so I can understand the impact of branch misses, lookup strategies, etc.

I spent Sunday writing an optimized solution to the language benchmark game’s reverse-complement challenge. I ended up doing all kinds of hacky things I’d never recommend doing in prod, like writing a custom vector and writing tricksy algorithms. Repo here, submission here.

Well, for all my hard work, I managed to come… Second! To, of course, a much tidier Rust implementation (❤️). Why? Not because the Rust solution is a more efficient (it’s not: it takes at least 2x more cycles and memory than my single-threaded C++ implementation), but because the the Rust implementation throws threads at the problem, which is the true power of Rust (in addition to the fact that the Rust version can be just as efficient as the C++ one by adding some SIMD and unsafe code).

This kind of underlines an important trend that’s likely to shape software development over the next decade or so: processors aren’t getting faster, but they are getting more cores. This means that there is an upper limit on how fast single-threaded software can get in the future. Rust has the dual advantage of being extremely fast and easy to multithread. It’s well-positioned for the future. All we need to wait for is when IT departments around the world start realizing how much it’s costing them to scale-out their ruby webapps ;)


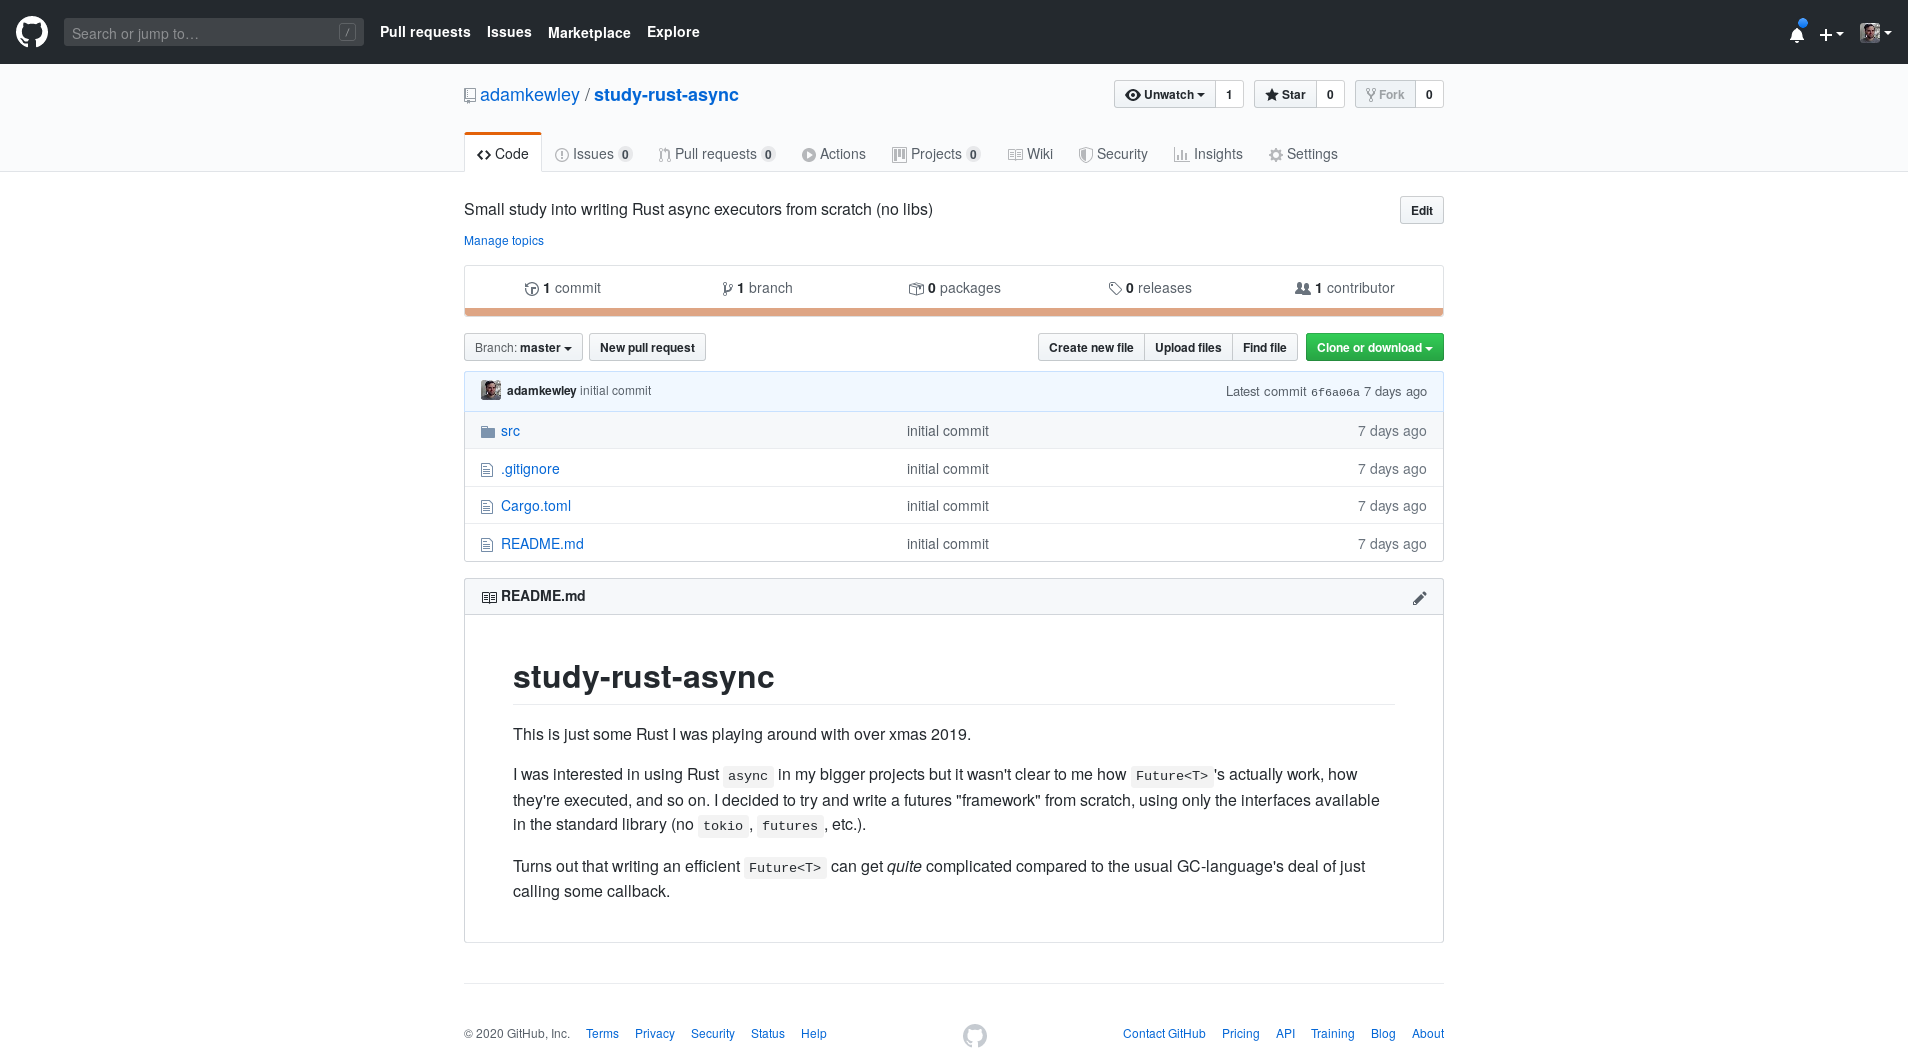
Rust Async From Scratch

Implementing Rust Async and Futures from Scratch

As is tradition for many developers stuck at the family home over xmas. I decided to go hack something.

Asynchronous programming is becoming more popular in all major languages. C++20 is going to get co_await and friends, python 3.7 now has async, and Rust has async / .await. Rust’s implementation of Future<T> is quite unique. It uses a “polling”-based interface, where the listener “polls” for updates but–and this is why I am making judicious use of quotation marks–polling only occurs when the asynchronous event source “wakes” the poller, so polling only actually happens when a state change occurs, rather than continuously.

This pattern can be used to decouple the waiter from the event source (if necessary) which is important for a high-perf language with strict threading logic like Rust. By contrast, almost all other implementations I’ve seen in the wild tend to use callbacks (e.g. .then() in javascript), which is easier to implement but can make it difficult to figure out which thread executes the callback and how backpressure should be handled.

This polling design can make implementing async Rust from scratch (as in, without using something like tokio to do it for you) quite complicated. There’s Future<T>s, Wakers, RawWakerVTables, etc. etc. to have to implement, and these would be fairly easy to implement in a GCed language, but Rust also requires that the implementations are suitably safe, which typically requires a little unsafe code. I implemented an async system with the help of this book (high-level overview) and the source code for futures and tokio. The experience was eye-opening, but much more complicated than expected.

github link


Demoing PetaSuite Protect at ASHG 2019

I went to Houston for ASHG 2019 with PetaGene to demo PetaSuite Protect, one of the products I’m helping to develop.

Giving tech demos is always a daunting task, especially because we gave our tech demos completely freeform - typing shell commands in front of clients is always fun ;). The demos were delivered without a hitch, though, so there’s something to be said about the effectiveness of writing bash scripts during a long-haul airplane journey.


igv.js: porting a large C/C++ codebase into browsers

One of the more interesting projects I’ve worked on recently is using emscripten to port PetaGene’s high-performance decompression suite to wasm so that it can run in a browser with no installation.

It required figuring out how where to draw the line between having a fully async API (ideal for javascript) and using Emscripten’s asyncify to emulate synchronous IO (ideal for standard C/C++ applications). It also required an ill-thought-out optimization to igv.js, which prompted a much better fix by the maintainer. This is why I like the OSS model: even bad ideas can prompt a discussion about better ones.


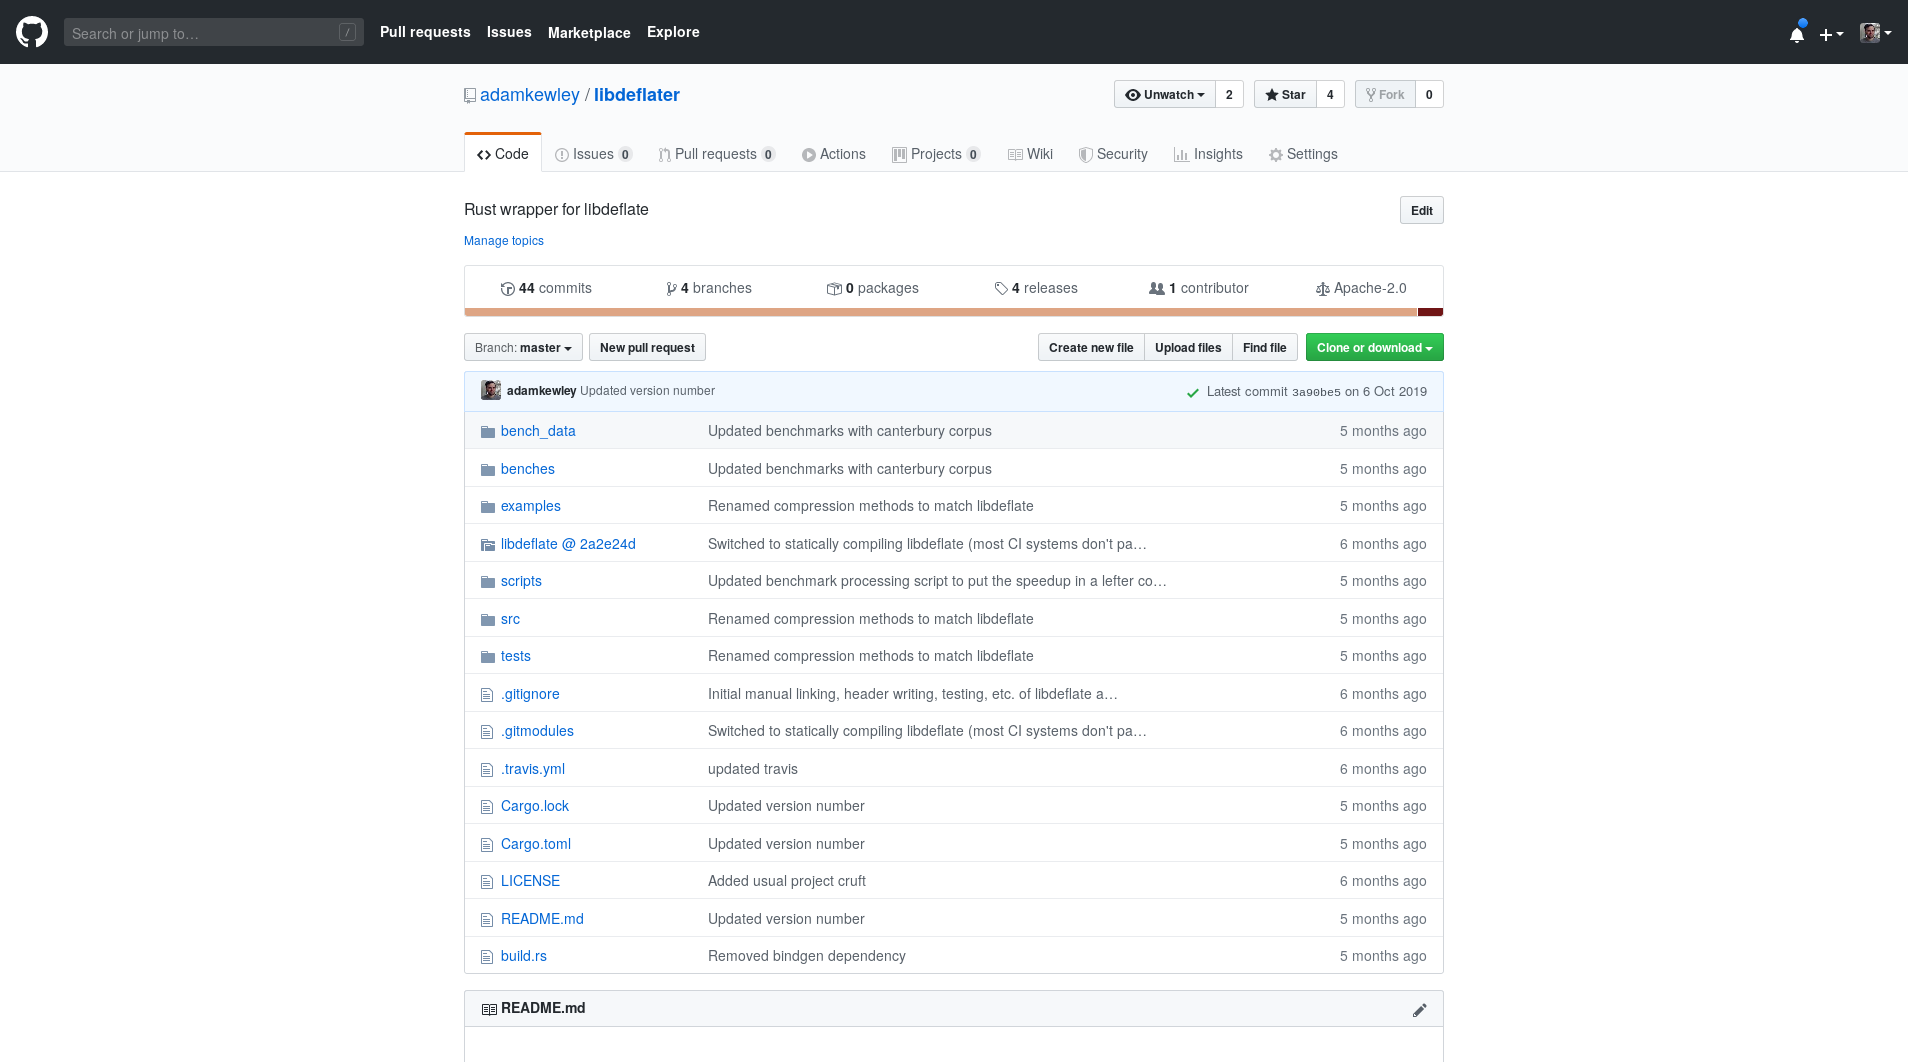
Side Project: libdeflater: Rust bindings to libdeflate

I’m a huge fan of Rust (❤️).

In a previous post I demoed fo2dat, which can be used to unpack Fallout 2 DAT2 files. I used the venerable flate2 crate for that project, but I’ve since learnt about libdeflate, which reported to be a much faster block-based DEFLATE (de)compression library.

libdeflate didn’t have Rust bindings, so I wrote some as a learning exercise. The result is libdeflater, which exposes a safe Rust API to the library. Benchmarks indicate that the library is around 2-3x faster than flate2, which is based on zlib and minizip. That’s a pretty insane speedup for such a popular compression format.


PetaGene wins Bio-IT World 2019

PetaGene won best of show for their latest product, PetaSuite Protect (link, archive). I had a great time at the event: people were super interested to learn what compression and encrpytion can do for them. I am looking forward to helping develop the PetaSuite Protect product :)


Side Project: Arduino Harmonograph

A small project I developed over xmas 2018 to produce this Arduino-based device. [Source Code (GitHub)]


Work Related: PetaGene scores $2.1 M in Funding

My current employment victim, PetaGene, has just scored $2.1 M in funding. Great news for an amazing team!

[TechCrunch story], [Cambridge Independent story]


Cover Design: Sulfone so good for COF catalysis

A cover I designed for the Cooper Group’s work on COF catalysis has been published in Nature Chemistry (article link, screengrab).


Jobson 1.0.0

After many weekends and evenings of fixing little bugs, cleaning up the codebase, and polishing the build, I’ve finally managed to publish v1.0.0 of jobson.

I open-sourced jobson late November 2017. The version I demoed here was already close to release-grade in terms of implementation (the server had >200 tests, was used in prod, etc.). However, the deployment, installation, documentation, and maintenance needed work.

For the open-source release, I wanted to make sure that jobson was OSS-grade before putting a 1.0.0 badge on it. The main changes over the last year are:

  • Stabilized all user-facing APIs (CLI, configuration, HTTP). No known breaking changes since Feb 2018.
  • Added more systemtests to ensure the above
  • Reimplemented UI in Typescript
  • Refactored and cleaned up server code
  • Fixed various bugs (race conditions, etc.)
  • Added various features into the specs (better output collection, templating, etc.)
  • Added more datatypes (float, int, long, etc.)
  • Added a lot more documentation, including API documentation
  • Significantly improved the build, which now builds the full stack into Debian packages, Docker images, etc.

I plan on patching 1.0.0 slightly with some little annoyances I spotted (immediately after deploying, of course), followed by another round of YouTube videos and other media. After that, it’s time to start slowly chipping away at 1.1.0.


Side Project: Live Demos

After several days of faffing around with Docker and build systems, I’ve finally managed to launch a demo’s page here. I’ll eventually integrate these into my about page, but they’re at least a useful resource for showing some of the technologies I’ve worked with.

One useful side-product of this work is that Jobson now has a basic docker image, which enables users to boot a pre-integrated Jobson UI + Jobson stack.

The Demos:


Side Project: Rust: fo2dat

tl;dr: I used Rust to make this CLI utility for extracting Fallout 1+2 DAT files.

I love the occasional playthrough of Fallout 1 and 2. They were some of the the first “serious” games I played. Sure, DOOM/Quake/Command & Conquer were also “mature”—I played them around the age of ~10, which marked me as doomed (heh) by the kind of adults that would also think eating sweets is a surefire path to heroin addition or something—but F1+2 included prostitutes, drugs, slavery, and infanticide: irresistibly entertaining topics for a teenager.

You might think that, with Bethesda buying the rights to Fallout over 10 years ago, F1+2 would’ve had a commercial re-release by now, much like what happened with Baldur’s Gate 1/2, or that such a popular franchise with so many fans would create enough momentum to get an open-source engine ported, but those things haven’t really happened. Probably because of various historical hitches.

F1+2 were originally developed by Interplay, which had a meteoric rise in the 90s followed by a precipitous fall in the early 00s (details). Bethesda excavated Fallout from Interplay’s remains in 2007. However, Interplay’s zombie, adopting a 90s zombie movie strategy of having a character bitten right before the credits roll, decided to give away F1+2+Tactics for free just before the IP passed over. As a consequence, Bethesda probably sees a F1+2 reboot as unprofitable. This assumes that the source code is even available to Bethesda. Interplay may have only handed them the sales rights + binaries, which would be a big shame.

I’ve always wanted to make a F1+2 source port, but it’s an incredibly difficult task for several reasons: the literature for open-source RPG game engines is thin, which means an engine will need to be built from first-principles; F1+2 uses a bunch of bespoke file formats, which means deserializers will need to be coded for each of them; and the game logic—what characters do, actions, etc.—is held as a binary opcode language, which requires a small virtual machine to handle.

The Falltergeist developers are the closest to surmounting the F1+2 Everest. They’ve created something that is close to a complete engine, which is amazing. I decided to chip away at the smaller problem of F1+2’s file formats. The result was fo2dat, a CLI utility for unpacking F2 DAT files, which might help any developers wanting to view the game’s assets in a file explorer.

The micro-project was also a chance to try Rust, the new hot thing in systems programming languages. I enjoyed the experience quite a bit: it feels like the Rust developers really understood the strengths of languages like C (non-OO, simple procedures handling data arguments), C++ (powerful compilers), Scala (pattern matching and abstractions), and Lisp (code generation). They combined those ideas with an excellent build system and package manager, which has resulted in a very nice platform.


Cover Design: Core–Shell Crystals of Porous Organic Cages

A cover I designed for the Cooper Group’s latest breakthrough. Modelled in plain Blender 2.79b. Post processing done in GIMP 2.8.18. [raw high-res render] , [cover official link], [journal article]


Integrating Software

tl;dr: If you find you’re spending a lot of time integrating various pieces of software across multiple computers and are currently using a mixture of scripts, build systems, and manual methods to do that, look into configuration managers. They’re easy to pick up and automate the most common tasks. I’m using ansible, because it’s standard, simple, and written in python.

Research software typically requires integrating clusters, high-performance numerical libraries, 30-year-old Fortran applications by geniuses, and 30-minute-old python scripts written by PhD students.

A consistent thorn in my side is downloading, building, installing, and deploying all of that stuff. For example, on a recent project, I needed to:

  • Checkout a Java (Maven) project from svn
  • Build it with a particular build profile
  • Unzip the built binaries
  • Install the binaries at a specific location on the client machine
  • Install the binaries at specific location on a cluster
  • Reconfigure Luigi to run the application with the correct arguments
  • Copy some other binaries onto the cluster’s HDFS
  • (Sometimes) rebuild all the binaries from source, if the source was monkey-patched due to a runtime bug
  • (Sometimes) Nuke all of the above and start fresh

Each step is simple enough, but designing a clean architecture around doing slightly different permutations of those steps is a struggle between doing something the easy way (e.g. a directory containing scripts, hard-coded arguments in the Luigi task) and doing something the correct way.

The correct way (or so I thought) to handle these kinds of problems is to use a build system. However, there is no agreed-upon “one way” to download, build, and install software, which is why build systems are either extremely powerful/flexible (e.g. make, where anything is possible) and rigid/declarative (e.g. maven).

Because there’s so much choice out there, I concluded that researching each would obviously (ahem) be a poor use of my valuable time. So, over the years, I’ve been writing a set of scripts which have been gradually mutating:

  • Initially they were bash scripts
  • Then they were ruby scripts that mostly doing the same as the bash scripts
  • Then they were ruby scripts that integrated some build parts (e.g. pulling version numbers out of pom.xml files), but were mostly doing the same as the bash scripts
  • Then they were a mixture of structured YAML files containing some of the build steps and ruby filling in the gaps
  • Then they were a mixture of YAML files containing metadata (description strings, version numbers), YAML files containing build steps, and Python filling in the gaps because Python’s easier to integrate with the existing researcher/developer’s work

After many months of this, I decided “this sucks, I’ll develop a new, better, way of doing this”. So I spent an entire evening going through the weird, wonderful, and standard build systems out there, justifying why my solution would be better for this problem.

Well, it turns out this problem isn’t suitable for a build system, despite it having similar requirements (check inputs, run something, check outputs, transform files, etc.). Although my searches yielded a menagerie of weird software, what I actually needed was a configuration manager. Ansible being a particularly straightforward one.

This rollercoaster of “there probably isn’t a good solution already available to this problem”, “I’ll hack my own solution!”, “My hacks are a mess, I should build an actual system”, “oh, the system already exists” must be common among software developers. Maybe it’s because the problem isn’t actually about developing a solution: it’s about understanding the problem well enough. If the problem’s truly understood, it will be easier to identify which libraries/algorithms to use to solve it, which will make developing the solution a lot easier. Otherwise, you’ll end up like me: Keeper of the Mutant Scripts.


(Not so) Fancy-Pants new Website

So, I just spent an evening + morning refactoring the site into a, uh, “new” design.

I only ocassionally work on this site these days—I now see it as the sparse journal of a madman that also likes to distribute mobile-friendly versions of his CV—but I thought it would be a nice and easy blog post to reflect on how the site has changed over the last 3 years.

The original version of adamkewley.com was launched in May 2015 and was the fanciest design:

It makes me feel a bit ill. The first version was modelled off of the kind of erudite landing pages you see 3-man startups use to try and sell IoT soap bars or something. By May 2016, I clearly had gotten sick enough of my own bullshit to remove a bunch of that cute stuff:

By May 2017, there were a few regressions:

And now, in March 2018, I’ve finally decided to just throw almost all fancy tricks out the window and use the simplest HTML + CSS solution I could create:

The previous versions of this site required a bunch of javascript libraries and jekyll gems to build. There were also subtle bugs that would pop up if you used it on a phone. Development/maintenance time was dedicated to fixing that - I also couldn’t help but tweak with the code.

This new site is HTML + a ~50 line long CSS file. It felt strangely liberating to make. Maybe because after working on ReactJS (e.g.) and angular sites I came across this absolute gem that satirically makes the point that barebones sites are: a) fast, b) easy to make, and c) responsive. I couldn’t argue with the logic and immediately wanted to just rip out all the complexity in my site, so here we are.

I wonder how quickly regressions will set in ;)


State Machines in ReactJS

I’m currently implementing job resubmission in Jobson UI and found that state machines greatly simplify the code needed to render a user workflow.

Background

A large amount of Jobson UI’s codebase is dedicated to dynamically generating input forms at runtime.

Generating the relevant <input>, <select>, <textarea>s, etc. from a Jobson job spec is fairly easy (see createUiInput here) but became increasingly complex after adding job copying because extra checks needed to be made:

  • Is the job “fresh” or “based on an existing job”?
  • Was there a problem loading the existing job?
  • Did the existing job load OK but can’t be coerced into the live version of the job spec?
  • Did the user, on being informed of the coercion issue, decide to start a fresh spec or make a “best attempt” at coercion?
  • etc.

Each of these conditions are simple to check in isolation but, when combined, result in delicate state checks:

render() {
  if (this.state.isLoadingSpecs)
    return this.renderLoadingSpecsMessage();
  if (this.state.errorLoadingSpecs)
    return this.renderSpecsLoadingError();
  else if (this.state.isLoadingExistingJob)
    return this.renderLoadingExistingJob();
  else if (this.state.errorLoadingExistingJob)
    return this.renderErrorLoadingExistingJob();
  else if (this.state.isCoercingAnExistingJob)	
    // etc. etc.
}	

These checks were cleaned up slightly by breaking things into smaller components. However, that didn’t remove the top-level rendering decisions altogether.

For example, the isLoadingSpecs and errorLoadingSpecs checks can put into a standalone <SpecsSelector /> component that emits selectedSpecs. However, the top level component (e.g. <JobSubmissionComponent />) still needs to decide what to render based on emissions from multiple child components (e.g. it would need to decide whether to even render <SpecsSelector /> at all).

State Machines to the Rescue

What ultimately gets rendered in these kind of workflows depends on a complex combination of flags because only state, rather than state and transitions are being modelled. The example above compensates for a lack of transition information by ordering the if statements: isLoadingSpecs is checked before isLoadingExistingJob because one “happens” before the other.

This problem—a lack of transition information—is quite common. Whenever you see code that contains a big block of if..else statements, or an ordered lookup table, or a switch on a step-like enum, that’s usually a sign that the code might be trying to model a set of transitions between states. Direct examples can be found in many network data parsers (e.g. websocket frame and HTTP parsers) because the entire payload (e.g. a frame) isn’t available in one read() call, so the parser has to handle intermediate parsing states (example from Java jetty).

State Machines (SMs) represent states and transitions. For example, here’s the Jobson UI job submission workflow represented by an SM:

From a simplistic point of view, SMs follow simple rules:

  • The system can only be in one state at a given time
  • There are a limited number of ways to transition to another state

I initially played with the idea of using SMs in ReactJs UIs after exploring SM implementations of network parsers. I later found the idea isn’t new. A similar (ish) post by Jeb Beich has been posted on cogninet here and contains some good ideas, but his approach is purer (it’s data-driven) and is implemented in ClojureScript (which I can’t use for JobsonUI). By comparison, this approach I used focuses on using callbacks to transition so that individual states can be implemented as standard ReactJS components. In the approach:

  • A state is represented by a component. Components can, as per the ReactJS approach, have their own internal state, events, etc. but the top-level state (e.g “editing job”) is represented by that sole component (e.g. EditingJobStateComponent)

  • A component transitions to another state by calling a callback with the next “state” (e.g. transitionTo(SubmittingJobStateComponent)).

  • A top-level “state machine renderer” is responsible for rendering the latest component emitted via the callback.

This slight implementation change means that each component only has to focus on doing its specific job (e.g. loading job specs) and transitioning to the next immediate step. There is no “top-level” component containing a big block of if..else statements.

Code Examples

A straightforward implementation involves a top-level renderer with no decision logic. Its only job is to render the latest component emitted via a callback:

export class StateMachineRenderer extends React.Component {

  constructor() {
    const initialComponent =
      React.createElement(InitialStateComponent, {transitionTo: this.handleTransition.bind(this)});

    this.state = {
      component: initialComponent,
    };
  }

  handleStateTransition(nextComponent) {
    this.setState({component: nextComponent});
  }

  render() {
    return this.state.component;
  }
}

A state is just a standard component that calls transitionTo when it wants to transition. Sometimes, that transition might occur immediately:

export class InitialState extends React.Component {
  componentWillMount() {
    const props = {transitionTo: this.props.transitionTo};

    let nextComponent;
    if (jobBasedOnExistingJob) {
      nextComponent = React.createElement(LoadExistingJobState, props, null);
    } else {
      nextComponent = React.createElement(StartFreshJobState, props, null);
    }
    this.props.transitionTo(nextComponent);
  }
}

Otherwise, it could be after a set of steps:

export class EditingJobState extends React.Component {
  // init etc.
  onUserClickedSubmit() {
    this.props.api.submitJob(this.state.jobRequest)
      .then(this.transitionToJobSubmittedState.bind(this))
      .catch(this.showErrors.bind(this))
  }
	  
  transitionToJobSubmittedState(jobIdFromApi) {
    const component = React.createElement(JobSubmittedState, {jobId: jobIdFromApi}, null);
    this.props.transitionTo(component);
  }
}

Either way, this simple implementation seems to work fine for quite complex workflows, and means that each components only contains a limited amount of “transition” logic, resulting in a cleaner codebase.

Conclusions

This pattern could be useful to webdevs that find themselves tangled in state- and sequence-related complexity. I’ve found SMs can sometimes greatly reduce overall complexity (big blocks of if..else, many state flags) at the cost of a little local complexity (components need to handle transitions).

However, I don’t reccomend using this pattern everywhere: it’s usually easier to use the standard approaches up to the point of standard approaches being too complex. If your UI involves a large, spiralling, interconnected set of steps that pretty much require a mess of comparison logic though, give this approach a try.


Cheeky Hackers

I’ve been running several webservers behind custom domains for a while now (plateyplatey.com, textadventurer.tk, and this site) and it never ceases to amaze me how cheeky bots are getting.

For example, certbot recently started complaining that textadventurer.tk’s TLS certificate is about to expire. That shouldn’t happen because there’s a nightly cronjob for certbot renew.

On SSHing into the server I found an immediate problem: the disk was full. Why? Because some bot, listed as from contabotserver.net decided to spam the server with >10 million requests one afternoon and fill the HTTP logs. Great. Looks like I’m finally going to implement some log compression+rotation.

Then there’s the almost hourly attempts to find a PHPMyAdmin panel on my sites. That one always surprised me: surely only a small percentage of PHP sites are misconfigured that badly? Lets look at the stats:

Percentage of websites using PHP

Even if 1 % of them are misconfigured, we’re doomed.


Jobson: Now in 2D

I recently made screencasts that explain Jobson in more detail. The first explains what Jobson is and how to install it. Overall, Jobson seems well-recieved. The first video seems to be leveling off at around 2700 views and Jobson’s github repo has seen a spike in attention.

Will other teams start adopting it or not? Only time will tell.